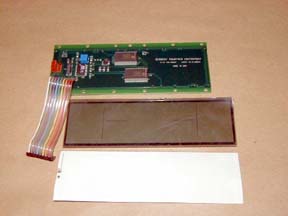
Micro Monitor Assembly

Micro Monitor Assembly

Page 7
 
insert the IC chips into their respective sockets. Follow all antistatic procedures
The board is finished. Temporarily install the two rotary knobs onto the switch shaft. Hook up a 12 volt power supply to the main board. Turn on the unit. You will hear a whining sound. Don't worry about it. Do the few tests outlined in the assembly manual. Finish the board by installing the yellow and white push buttons. Turn off the unit and put the two boards aside.
 
Gather the LCD driver board, LCD screen, Backlight panel, front face plate, two black plastic gaskets, plastic nonglare screen, two "Zebra" rubber connectors, and all the double sided tape in the kit.
Use the faceplate as a guide to cut the gaskets. Remove the protective films from the LCD screen and nonglare screen. Insert a gasket into the faceplate followed by the nonglare screen, second gasket, LCD screen, and backlight panel.
Note: Make sure of the orientation of the LCD panel (top on top).